Showing posts with label food. Show all posts

Thursday, January 30, 2014

Facts About Flour

Or just one fact about flour:

Old flour makes cruddy sugar cookies. 

Here's how I came to this realization. For Christmas, I made my boyfriend the cutest sugar cookies. 


Aren't they adorable? I made them late at night on Christmas Eve Eve so that he wouldn't know about them until Christmas. I painstakingly rolled out the dough on Christmas Eve morning and had the darnedest time getting that green sugar to stick. As your eyes will tell you, they looked great when they were done. 

But they tasted like crap. Or, more accurately, they tasted like flour. I blamed the ratios in the sugar cookie recipe, which was part of the problem, but it wasn't the whole problem. As I discovered when I made waffles a few weeks later, our flour was old, and therefore, not good. 

Last night, I made new cookies. (There is no picture because they were significantly less twee.) I used new, unbleached all-purpose flour (and a less flour-heavy recipe), and they turned out great. 

I realize this may not be the discovery of the century, but it certainly made me think twice about using whatever ingredients are lying around. 

Saturday, August 10, 2013

Chicken Korma = Nostalgia

Way back when I lived in Edinburgh, one of my favorite things was the chicken korma at Tikka Mahal. I have never had a korma as good as they made there, but in an attempt to capture a taste of those times, I've found and modified this korma recipe. I can't speak to its authenticity, but it's pretty tasty. It's super involved but worth the work in the end.

Chicken Korma


Ingredients 
¼ c cashew halves
¼ c boiling water
3 cloves garlic
1 Tbsp pureéd ginger
3 Tbsp vegetable oil
1 large onion, minced 
1 tsp ground coriander
1 tsp ground cumin
1 tsp garam masala
1 tsp ground turmeric
1 tsp chili pepper
½ tsp ground cinnamon 
1 Tbsp brown sugar
1 Tbsp curry powder
4 skinless chicken breasts, diced 
¼ c tomato sauce
1 c chicken broth
½ c coconut milk
½ c plain yogurt
2 tsp cornstarch, mixed with equal parts water
Salt

Directions
1. Place cashews in a small bowl, and pour the boiling water over nuts. Set aside for 15 to 20 minutes. 
2. Place garlic and ginger in food processor and blend until smooth; set aside.
3. Heat oil in wok over medium heat. 
4. Stir in onion, and cook until soft, about 3 to 5 minutes. 
5. Mix in garlic/ginger paste, and season with coriander, garam masala, cumin, turmeric, brown sugar, curry powder, and chili powder. 
6. Stir in chicken, and cook for about 5 minutes. 
7. Pour in tomato sauce and chicken broth. 
8. Cover, reduce heat, and simmer for 15 minutes, stirring occasionally.
9. Meanwhile, place the cashews, along with the water in which they were soaked, and the cream and yogurt into food processor. Process until smooth.
10. Stir the cashew mixture into the chicken and onions. 
11. Simmer for 15 minutes, stirring occasionally. 
12. Stir in the cornstarch mixture, and continue cooking for 1 to 2 minutes.
13. Serve over basmati rice. 


Monday, July 29, 2013

Pineapple Casserole

Tonight I made one of my favorite recipes, which I'd like to share with you, Dear Reader: Pineapple Casserole. The first time I share this dish with people, their reaction is usually skeptical. And yet, pineapple pizza is scientifically proven to be the best kind of pizza, so clearly pineapple and cheese belong together. This recipe is not only delicious but also super easy!

Ingredients:
1 20-oz can pineapple chunks in juice
2 Tbsp all-purpose flour
2 Tbsp sugar
1 ¼ cup shredded cheddar cheese
1 ½ (approx. 25) crushed Ritz crackers
3 Tbsp melted butter

Directions:
1. Preheat oven to 350°F. 
2. Drain pineapple juice, reserving 3 tablespoons. 
3. Arrange pineapple on the bottom of a 1½-quart casserole dish. 
4. Combine flour and sugar and sprinkle over pineapple. 
5. Drizzle pineapple juice over top. 
6. Cover with cheddar cheese. 
7. Combine crackers and butter and cover the cheese. 
8. Baked, covered for 15 minutes. 
9. Uncover and bake another 10 minutes. 

Monday, January 7, 2013

12 Days of Christmas: Day Twelve: Black-Eyed Pea Cakes

Well, we did it, chums. You got 12 new posts and I proved to myself that I can create original content on the regular. True, this one is a day late, but that's better than a month late, I suppose.

For this final post of Christmas, I would like to share one of my most successful new recipes: Black-Eyed Pea Cakes.

I got the recipe from one of the food demonstration people at Publix and then I modified it to be vegan. I served them at my New Year's Eve party (for good luck), and they were a huge hit, so my boyfriend and I made them again a couple of days ago. As fast as we could churn them out, they were gone. Here's how we did it.

     Ingredients

  • 2 cans black-eyed peas, drained, rinsed, and divided
  • 1 8-oz. tub Tofutti (fake cream cheese) or regular cream cheese
  • 3/4 cup corn meal
  • 1/4 cup all-purpose flour
  • 1/4 tsp baking soda
  • green pepper sauce (recipe calls for 2 tsp, but I use a lot more and eyeball it)
  • 1/2 bunch green onions, coarsely chopped
  • 1/4 almond milk (or soy or regular milk, but I like the almond)
  • canola oil
  • salt (to taste)
  • pepper (to taste)
  • other spices (to taste) - this is the step where you get to be creative because I'm not going to tell you what to put in there, mostly because I can't remember. I was just tossing things in willynilly 

1. Whisk together corn meal, flour, and baking soda.

2. Using a food processor or immersion blender, blend together corn meal mixture, one can of beans, green pepper sauce, milk, Tofutti, salt, pepper, and any other spices you wish.

3. Stir in second can of beans and green onions.

4. Form into 4-inch patties.


5. Heat enough oil in a large pan to coat the bottom of the pan, and fry patties 3-4 at a time. Cook for about 2 minutes on each side, or until they start to get brown and crispy.


We served them with green pepper sauce, Thai sweet chili sauce, and/or sour cream. Very popular!


Wednesday, January 2, 2013

12 Days of Christmas: Day Eight: Eggnog and Angel Food Cake

You know what goes hand-in-hand during the holiday season? Eggnog and angel food cake. I bet you're wondering why, dear reader. Well, I'll tell you!

I always make my own eggnog this time of year. I think it tastes better than the store-bought stuff, it's not a strange shade of yellow, and I feel comforted knowing exactly what's going into it. Plus, when people drink it, I get that praise I so crave. So a few years ago I started making egg nog, and I've pretty well perfected it by now (if I do say so myself), but one thing has always eluded me: what to do with the leftover egg whites. My recipe calls for a dozen egg yolks, leaving me with a lot of unused egg. I could make egg white omelets or some bullshit, but that's way too healthy.

So this year, for the first time, I decided to Google what to do with leftover egg whites, and I discovered that angel food cake just happens to require about a dozen of them. Hooray! So now I've got a new holiday tradition. For every batch of eggnog I make, I also have to bake a cake. Logic!

My eggnog recipe can be found on this previous post. Here's how I made the angel food cake:

Ingredients
  • 1 cup cake flour (not self-rising)
  • 1 cup, plus 1/2 cup sugar
  • 1/2 tsp salt
  • 1 1/2 cup egg whites (about 12 large eggs) at room temperature
  • 1 tsp cream of tartar
  • 2 tsp fresh lemon juice
  • 1/2 tsp vanilla extract
1. Preheat oven to 350F. Grease a tube or Bundt pan.

2. In a small bowl, whisk together the flour, 1/2 cup sugar, and salt.

3. In the bowl of an electric mixer, begin to whip the egg whites on medium speed. When they become foamy, add the cream of tartar and lemon juice. The cream of tartar will act as a stabilizer for the eggs.

4. Increase the speed to high and continue to whip the egg whites until they just begin to hold their shape in soft, droopy peaks. Gradually whip the remaining sugar into the whites, 1/4 cup at a time. Do not overwhip. You want them soft and cloud-like. Just before you finish whipping, add the vanilla.

5. With a rubber spatula, gradually fold the flour mixture into the egg whites.

6. Spoon batter into pan, smooth the top, and bake for 45 minutes.

7. Remove from the oven and immediately invert the pan over a cooling rack and let it sit until cool. Then remove the pan and enjoy!


Sunday, December 30, 2012

12 Days of Christmas: Day Four: Brownies in a Jar

I've been wanting to do this for a couple of years, and this crafty Christmas seemed like a good time.

Project #3: Brownies in a Jar


Mixes in a jar really appeal to me for some reason. They combine the craftiness of scratch-made food with the ease of store-bought mixes. The idea, if you've never seen it, is that you put all of the dry ingredients for a given recipe in a jar, measured out and usually layered in a decorative way. Then you give it as a gift, along with instructions for adding wet ingredients and cooking. It's like giving them brownies, except the jars keep longer and the receiver gets to share the glory of making something delicious. 

Ok, so brownies in a jar. 

Ingredients
  • 1 1/2 cups granulated sugar
  • 1/3 cup dutched cocoa (I used Hershey's Special Dark)
  • 1 cup sifted all-purpose flour
  • 1/2 tsp baking powder
  • 1/4 tsp salt
  • 1 cup peanut butter chips
  • 1/2 cup mini semi-sweet chips
1. Mix flour, baking powder, and salt in a bowl. 

2. Layer ingredients in a quart-size jar in the following order: sugar, cocoa, flour mixture, peanut butter chips, and semi-sweet chips. Tap the jar a bit after each layer to allow the layer to settle. By the time you get to the chips, you might have to push everything down a bit to make it all fit. 

3. Attach a label with the following instructions and give as a gift. 
  • Heat oven to 350 F.
  • In a large bowl, mix 1/2 cup (1 stick) of melted and cooled butter and 2 eggs, lightly beaten, with the contents of the jar.
  • Pour into greased 8x8 baking pan.
  • Bake for 35 minutes. 
Here are some labels I made if you don't want to write all that out:

Thursday, November 15, 2012

IKEA 2: Return to Sanity

A long time ago, I wrote about my nightmarish inaugural trip to IKEA. It was a dark time for me, and it almost turned me off from the Swedish retailer forever. But more than a year has passed, and things've changed. I've changed. Maybe IKEA's changed a little too. And I feel I must return to this topic so that we can all have a little closure.

As I may have mentioned,* I spent a good part of the past year in Europe: Home of IKEA. Living in a residence hall, it wasn't long before some of my fellow residents proposed a trip to our local home store for some inexpensive dorm accoutrements. I was, in a word, hesitant. My last visit to IKEA was not something that I cared to repeat, but in the spirit of fostering new friendships and overcoming obstacles, I agreed to go. It also helped that I was accompanied by a group of people who both knew and liked IKEA, as opposed to my parents, who were as clueless and uncomfortable as I.

Two things made my experience that day not only bearable to downright enjoyable.

Number one:
Crowds. Or lack thereof. The Tampa IKEA was swarming with people. I believe I referred to them as "the mindless hoard." Whether because this IKEA was more local, less new, or just less novel to the Scottish, it was not terribly crowded, so I was able to take my time and not feel quite as overwhelmed by the simple experience of walking around a store.

Number two:
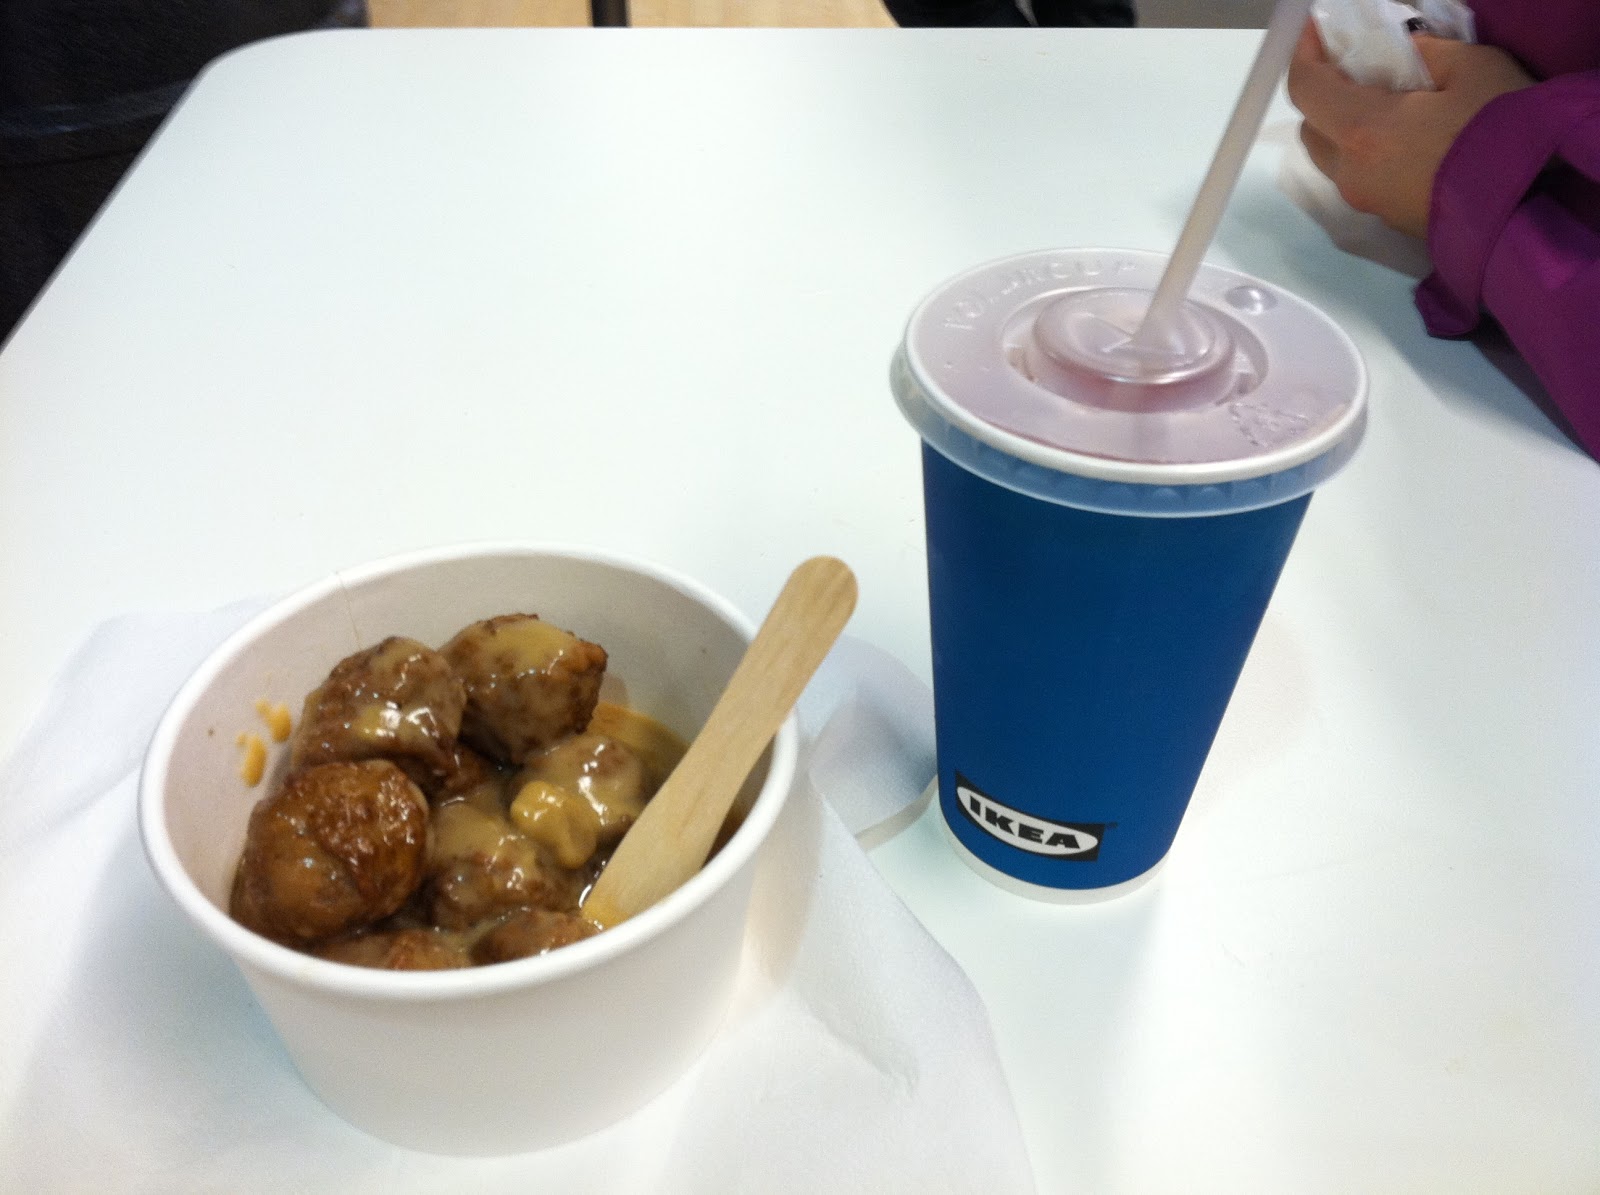
MEATBALLS. There may have been other things that made that day good, but--- nope, meatballs. All the meatballs. I had heard IKEA had good meatballs, but ohmygod meatballs.** I don't know what makes these things so good. Yes I do. Gravy. Also lingonberry jam, which is just so so Swedish, but absolutely essential. My whole trip to that store was given purpose when I tasted those delicious balls of meat. I'm not kidding you when I say that I have since returned to IKEA just for the meatballs. Sometimes I get other stuff too, but usually not. I would brave all manners of hell just to have those waiting for me after checkout. My big mistake that first time was bypassing the food stand that sold them.

With lingonberry drink!
Oh, also, IKEA has one of the most comfortable chairs I've ever owned. By now a staple of dorm rooms everywhere, the POÄNG chair is so much greater than you would ever think it could be.

Ultimate comfort
Add the footrest, and this is my definition of luxury. The day I get a new one of these (I had to leave mine in Scotland) is the day I feel whole again.

So there you have it, dear readers. I have made a 180 with regards to the IKEA store. It really does have its merits.

Like all these straws! 
Or these many lamps! 
This weird fork? 
This part still makes me kind of nervous.

But for those of you who have still never gone or, like me, had a terrible first experience and haven't gone back, here are a few tips:
  1. Go with someone who knows what they're doing.
  2. Go in with a game plan. Check the website before you go so you know what you want. Browsing is possible in IKEA, but it's totally overwhelming if you're not acclimated to it. 
  3. Eat some goddamned meatballs. If you don't love those things, you can GTFO. I kid, I kid. You don't have to love the meatballs just because I do. But at least try them. 
They might change your life. 


*Once or twice
**Have I typed the word "meatballs" enough yet?

Sunday, November 4, 2012

Halloween Party Recipe Roundup

I just wrote a long and thoughtful post about the Halloween party I threw last Saturday, and then Blogger decided to delete it. So instead I will cut to the chase and post recipes for my two favorite dishes from that party.

Mozzarella-Stuffed Meatballs


Ingredients
  • 1 lb ground beef
  • 1 lb ground pork
  • 1 cup breadcrumbs
  • 3 eggs
  • 1 tbsp Italian seasoning
  • 1 tsp salt
  • 1/2 tsp pepper
  • mozzarella string cheese
  • olive oil
  • 2 jars tomato sauce

Instructions:
  1. Combine everything except cheese, oil, and sauce in a bowl and mix thoroughly with your hands. It's very satisfying. And gross.
  2. Form mixture into 1.5" to 2" balls.
  3. Cut string cheese into cubes. Put one cheese cube inside each meatball, and then reform meat to seal it in.
  4. Heat some olive oil in a large skillet. I used cast iron. For flavor!
  5. Brown meatballs on all sides in the oil, taking care not to horribly disfigure yourself from oil burns.
  6. Set aside browned meatballs, and pour tomato sauce into the skillet and bring to a simmer.
  7. Add meatballs back into the sauce, cover, and let simmer until cooked through (about 30 minutes).
  8. Enjoy delicious meatballs.
As you can see in my photographic representation of the final dish, I used tons of sauce. You can probably used less, but the sauce was really good, so the more the merrier. Also, some the cheese managed to escape its meaty prison, but as the old saying goes, "Cheese tastes delicious, whether inside meatballs or out." You know that old saying, right?


Butternut Squash Pie


Ingredients:
  • 1 (or 2) unbaked and chilled pie shell(s)
  • 1/2 cup pureed butternut squash, about the yield of a small to medium squash
  • 1 cup packed light brown sugar
  • 3 eggs
  • 3/4 evaporated milk
  • 1 1/2 tsp ground cinnamon
  • 1/4 tsp ground nutmeg
  • 1/4 tsp ground ginger
  • 1/8 tsp ground cloves
  • a dash of pumpkin pie spice
  • 1/4 tsp salt
  • 2 tbsp all-purpose flour
  • 1 tbsp melted butter
  • 1 tsp vanilla

Cooking the squash:
  1. Cut the butternut squash in half lengthwise. The squash is tough and does not wish to be rent asunder, so be careful not to injure yourself trying to divide this thing. Take it slow and easy.
  2. Remove seeds, and then place squash halves facedown on a cooking pan lined with greased foil, to facilitate cleanup, as the cooked squash will tend to stick. 
  3. Pour 1/2 cup water into the bottom of the pan, cover loosely, then cook at 400°F for about 55 minutes, or until squash is tender. 
  4. Scoop cooked squash out of its skin and puree with an immersion blender (or your preferred method of squash squashing). 
  5. Set aside 1/2 cup of pureed squash. Save the rest for eating with some butter and salt, maybe. 
Assembling the pie:
  1. Reduce oven temperature to 350°F. 
  2. In a mixing bowl, combine squash and brown sugar and beat with an electric mixer until combined. 
  3. Add eggs, evaporated milk, spices, salt, flour, butter, and vanilla, and beat until well blended. Note that all the spice proportions can be modified based on your tastes, but trust me when I say this pie was hella good the way I made it. 
  4. Pour filling into pie shell. I ended up having enough filling for two 9-inch shells, so I made two not-entirely-full pies. If you have a bigger shell you might be able to use all your filling on one pie, but since the shells usually come in sets of two, I recommend just making two pies. 
  5. Bake for 45 to 55 minutes, or until filling is set. After 35 minutes, I checked the pies and put crust protectors around the edges to keep the crusts from burning. If you don't have the fancy silicon crust protectors my dad bought, you can fashion some out of tin foil. Just be careful not to burn yourself on hot pie. 
  6. When filling is set, remove from oven, allow to cool, then enjoy some pie. 

These pies were fantastic. I decided to make them because I was once told you could substitute butternut squash for pumpkin in a pumpkin pie recipe, and that fact intrigued me. Making pumpkin pie from scratch was an odious ordeal that I never intend to repeat. Fresh pumpkin is not worth the trouble when canned pumpkin tastes just as good. It's all about the spices, anyway. But the butternut squash was easy to cook, and it really tasted excellent.

So there you go, dear readers, maybe try out these recipes at a holiday party. You won't be disappointed!

Monday, October 22, 2012

Recommendation: Haggis

So as I may have mentioned, I just spent a year in Scotland, and I'm pretty sure it's a crime to spend that long in that country without trying haggis. Actually, I'm going to go as far as to say that it's a crime to spend any length of time in Scotland without trying haggis. Haggis is like their national food. It is number one of the list of things that are quintessentially Scottish. And here's the thing: it's great. If you don't know what haggis is, maybe it's best I don't tell you, but what I want to get across in this post is that "what it is" is not really important. What is important is that it's food, it's safe, it's delicious, and it's not at all what you would expect. 

Ok, to put it bluntly, haggis is the throwaway parts of the sheep minced with oatmeal, onion, and spices, and then cooked in a broth for several hours. Traditionally it was cooked inside a sheep's stomach lining, but nowadays it's generally just cooked inside sausage casing, which is appropriate, because I tend to describe haggis as being similar to sausage without the casing. It is usually served with "neeps and tatties," which are turnips and potatoes, mashed and sometimes mixed together. Then atop it all must be poured whisky sauce, a gravy made from Scotch whisky. 

People "fear" haggis for a number of reasons, most of them based on the "what haggis is" issue. But the simple truth of haggis is that if no one told you what it was, you would likely never know. Because of the mincing, the structure of the various sheep parts is indeterminate, and the addition of all the spices changes the flavor completely. Add in the neeps, tatties, and whisky sauce and what remains is a fantastic pile of flavor. Yes, I call it a pile because I heartily recommend just mixing it all together and going to town. 

I've had a number of different haggises (haggi?), and they were all wonderful. I've also had haggis in a number of different forms, including fried haggis balls and a haggis burger, both of which were also delicious. Below you will find two examples of some traditional haggis that I ate. The one with the entire gravy boat full of whisky sauce was better, for obvious reasons. 


So in conclusion and in summary, if you ever go to Scotland, eat some haggis. At least take a bite. It won't kill you, and you may discover something you enjoy. Which is pretty much my philosophy on all foods: at least give it a try; you might like it. And if you don't, I'm sorry. Drink some water and go find a deep-fried Mars bar. 

Wednesday, October 17, 2012

Yo! Sushi

I need to tell you about an awesome sushi place I discovered in the UK. It's called Yo! Sushi, and I swear I'm not being paid by the company to plug them; I just love this place so so much.

What I like to call "conveyor belt sushi" is not uncommon to the UK and other European countries. It came from Japan and has really caught on. Why it hasn't really made it to the US yet, I'm not sure, because it's the greatest thing. Here's the deal: you walk into the restaurant and get immediately seated (in my experience). There are a few booths, but most of the seats are set up bar-style at a circular(ish) counter. In the middle of the circle are the chefs, producing all of the dishes as you watch, and all the way around the counter is a conveyor belt. As the chefs finish making dishes, they set them on the conveyor belt, which then brings the food to within grabbing distance of you, the diner.


And the best part is, you can start grabbing and eating things the second you sit down! There is a menu in case you want hot food, or if the thing you want isn't going around at the moment, but it's basically the pinnacle of convenience. Everything you could need is within reaching distance: glasses, water dispensers (both still and sparkling), chopsticks, wasabi, soy sauce, little bowls. If you need a waiter for any reason (like to order a non-water drink or get a refill of your endless bowl of miso soup), there is a call button. You don't have to wait for them to come check on you! Then, when you're done, the waiter counts up how many of each color plate you have. Each color is worth a different amount, so it's probably good to check on those prices before you start grabbing only gray plates or something.


I could drop so much money at this place, just gorging myself on Japanese food. And I would! And I have! Because apart from the novelty of it, the food is really really good. Sigh. It's just... it's just... great, you guys. I wish I could tell you to go out and get some right now, but unless you live in the UK, I guess you can't. I can't, and that makes me very sad. I went there on my birthday this year. I also went there for my last dinner in Edinburgh. It means a lot to me. So if you ever have a chance to try Yo! Sushi, do. And cherish it. Cherish it!


Monday, October 15, 2012

Sabrina's Chickpea Salad

When I was in the south of France back in June (did I blog about that? Hmm...), my friends and I stayed in a luxury mobile home with a kitchenette, so we ended up cooking most of our meals to save money. It was very fun, and we made many delicious things, but one of the dishes that really jumped out at me and begged to be remembered (no offense to the other wonderful things we made) was my friend Sabrina's recipe for "Chickpea Salad." It's super easy and super delicious.

Here it is, with the measurements I used when I made it a couple of days ago:

Ingredients
  • 3 cans of chickpeas, drained
  • 1/2 a red onion, diced
  • The juice of 1 lemon
  • Olive oil
  • Dried basil 
Mix all the ingredients in a bowl, and then eat it. See? Simple. The olive oil and basil I just eyeballed. And with all of these ingredients, you should just play around to get the taste you want. You can also used dried mint instead of dried basil. I've never done it, but Sabrina says it's good. And presumably, you could also try it with fresh herbs. Plus, it's one of those things that's even better the second day, after all the flavors have had time to coalesce. Yum!


Friday, October 12, 2012

Vegan Spinach Artichoke Dip

Generally, I would not even entertain the idea of vegan foods. I like animal products waaaaay too much. But I have a friend who has been vegan for over a year now, and while my other friends and I make sure to mock him constantly, I recently began to think that it might behoove me to find some vegan recipes so that he can eat things that I make.

We have a lot of artichoke hearts in my house right now that my mom bought as snacks. I know, eating artichoke hearts as a snack seems weird, but they're really tasty, and I would totally snack on them, except that I can't stand the texture. It's like chewing on rubber. Or styrofoam. Either way, it's awful and I can't do it. But I thought, maybe if I puree it with other things I could enjoy the taste of artichoke without all the pesky feeling-like-I-would-rather-die-than-chew-on-that-rubbery-crap. So artichoke dip! And then wanting to make something my vegan friend could enjoy, I began searching for vegan recipes. I found this one.

Ingredients
  • About 1 cup of artichoke hearts from a jar, drained
  • 3 cloves of garlic (or less, I just love garlic)
  • 1 can of white beans, drained
  • Less than 1/4 cup sesame seeds (like maybe 1/5 cup? Just eyeball it)
  • Juice of 1 lemon
  • 1/2 cup steamed spinach, chopped 
  • 3 tablespoons olive oil
  • Salt and pepper, to taste
  • Italian seasoning, to taste
Put the sesame seeds in a bowl, then put the beans on top of them. (This is to keep the sesame seeds from flying everywhere when you get to the next step.) Using an immersion blender (or I guess a regular blender if you don't have an immersion one) blend them until mostly smooth. Then add all the other ingredients and blend until as smooth as you want. I'm all about these easy recipes lately. Also, I discovered that if you don't add the artichokes and spinach, you essentially get homemade hummus, which is also great.

Oh! But be sure that all of your ingredients are fresh and/or haven't turned. The first batch of this I made was with sesame seeds that were about two years past their expiration date and they made the whole thing awful. I had to dump it and start again with fresh sesame seeds. The same goes for your oil and artichokes, as these things sometimes stay around in a cupboard for a while. I served the final (not expired) product with blue corn chips. It went over very well. Even with the vegans!


Wednesday, September 26, 2012

Further Adventures in Cheese

I didn't mention this in my last post, but the primary reason that I made that lemon basil ricotta cheese was so that I could eventually use it in the creation of stuffed shells. And not just any stuffed shells, dear readers, but Lemon Basil Ricotta Stuffed Shells in Champagne Cream Sauce. It sounds fancy because it is! I used the recipe I found on Simply Scratch, and the results were pretty good. Here are some pictures of the process:

Cooking shells while trying to make sauce 

Shells in sauce 

Shells in sauce with parmesan 

Shells in sauce with parmesan after baking 

Close-up shot 

Dinner

Overall, I'd say the shells were a success. Although I do think the sauce was a little too champagne-y. I don't think enough of the alcohol cooked off. Also, this is a recipe that really benefits from having either a sous chef or the foresight to measure out all your ingredients before you start. I tend to do it as I go, but especially when making the sauce, I really needed everything to be ready. I was all alone, trying to whisk constantly, and then I had to stop whisking to open my bottle of champagne and measure things. And this was a very complicated bottle of champagne! I didn't get a picture; just take my word for it.

Anyway, there you have it. The real gem of this dish was the cheese. I'll definitely be making that again. The sauce was a bit heavy, but I might give it another go sometime. And to keep this from becoming exclusively a food blog, maybe I'll write about something non-culinary next time. Cheers!

Friday, September 21, 2012

Self-Reflection and Cheese

Today I realized something about myself. I really enjoy cooking (I already knew this), but I think the reason for that boils down to three primary factors:
  1. I love to eat.
  2. I love making things (not just food, but crafting, in general).
  3. I love praise. 
This last is a big inspiration for me when it comes to cooking. If I were just cooking for myself I could satisfy the first two loves, but I would be missing that all-important third factor. So I share my creations with friends and family, thereby satisfying my need for positive reinforcement. To that end, today, I made cheese! 

Cheese is surprisingly easy to make, as long as you're not hoping to end up with an aged cheddar or an authentic Italian parmesan. Easy cheese is soft and spreadable, like a ricotta, which is what I made today. And despite being pretty simple to execute, I'm quite proud of the result. 

I got this recipe from the Internet, so if you would like to recreate it, I suggest you follow this link. But for the more casual cooking enthusiast, here is a brief summary of what I did. 

First, I put a gallon of whole milk into a big pot and slowly heated it up to 185˚F, stirring frequently to keep the milk from scalding. This was also a great opportunity to finally use that candy thermometer I bought three years ago. I still haven't made candy with it, but it conveniently hooks onto the side of the pot so you can monitor the temperature as you go. 


Once the milk reached the desired temperature, I removed it from the heat and added 2/3 cup lemon juice. I used a combination of fresh and bottled. I don't think it really matters, all you really want is the acid. I guess if you can tell a flavor difference, bully for you. I then left the lemon and milk mixture undisturbed for 25 minutes, during which time I minced some basil. Once the milk was all curdled from the citric acid, I strained it through some cheese cloth. That's what it's named for, apparently! 

After it was all strained, I mixed in salt, pepper, and the zest of two lemons (hence the portion of fresh lemon juice). I then separated my cheese into two containers, one of which remained plain, while the other got the minced basil (because my dad doesn't like basil, and I didn't want him to miss out on the lemon ricotta). 

Here's the end result (with a copy of Elizabeth Bowen's The Heat of the Day in the background for artistry): 


Then I had to refrigerate it for a couple of hours; but when it was ready, my parents and three of my friends tasted it and gave me that sweet sweet praise I crave even more than I crave delicious lemon basil ricotta cheese. 

Friday, September 7, 2012

The jnd and Diet Mojitos!

July saw the debut of an exciting new project by a group of very talented people I am honored to know personally. The jnd, which stands for "just noticeably different," is an artist collaborative consisting primarily of Julie Slonecki, Kenny Sharpless, Billy Green, and Vanessa Ndege, four Washington and Lee University graduates who want to build a community for musicians and artists to share contacts, experience, and knowledge. To that end, they are producing their own art, music, and designs, which they will use to promote further artistic collaboration.

Their first release is a collection of eight tracks, featuring very listenable electronic instrumental music, with influences in hip-hop and blues. These tracks highlight the members' own creative interests, which they hope will inspire other musicians and artists to further develop what they've begun. In addition, Sharpless and Slonecki are currently working on solo projects due out in the fall.

I'm looking forward to seeing what comes next, and I can tell you from personal experience that these people are cool as hell. Take a listen to "Dance to a song," which features some great sampling of the Beatles. You owe it to yourself.


You can check out more from The jnd on Facebook, Twitter, and SoundCloud.


And what better way to enjoy this awesome new music than with diet mojitos? That's right, my friends. Thanks to Crystal Light and my mother, I have discovered a fantastic new potent potable.

Crystal Light (I swear I'm not buzz-marketing) has recently started making a series of "mocktail"-flavored drink mixes, including margarita and mojito. Add a little booze and you're in business! Assuming your business is drinking sugary alcoholic beverages. To each his own.

Here's how we did it:

1 package Crystal Light mojito mix
1 1/2 cups light rum (I suppose you could use less, but why would you want to?)
2 cups Sprite Zero (these are diet mojitos, remember)
2 limes
~ 2 1/2 cups water (to taste)

Serve over ice. Preferably in crazy bent glasses. Fan-frickin'-tastic.


Monday, August 6, 2012

Perhaps the best thing I've ever had to drink

Back in April I was home for a few weeks and found myself hanging out with a few friends (as I am wont to do). We got to talking about Epcot's Food and Wine Festival, and one of my friends brought up a drink he had there once, which was essentially puréed kiwi and Sprite. Immediately I knew I had to have that thing. What about that doesn't sound wonderful?

So the three of us got in the car and drove directly to our local supermarket, where we purchased twelve kiwis and a bottle of Sprite. On our way out of the store, the other of my friends suggested we stop in at the liquor store next door. 'Twas there that we discovered the magical elixir that is Skyy Dragon Fruit vodka. Knowing very little about dragon fruit aside from the fact that it looks cool, we decided to purchase this vodka and incorporate it into our concoction.

Back at the house, we peeled and chopped our dozen kiwis, puréed them in the blender, and then set to work mixing our purée with the Sprite and vodka. I can't tell you the exact proportions we decided on. Mostly because I don't remember them. But play around with it. In the end, what we created is perhaps the best drink I've ever had. And just in case you think the dragon fruit vodka might have been superfluous, it was not. It was essential to the perfection of this drink. So go out, buy some kiwis and vodka, make this drink, and then tell me it wasn't one of the best things you've ever done.


The plums and oranges are unrelated. They just looked nice in the picture.


Tuesday, January 10, 2012

Happy Last Year on Earth!

Well, friends, it's 2012. I feel like this first post of the year should be somehow epic. After all, this could be our last year of existence, if you believe those wacky Mayans. I've had an amazing holiday break at home, which included a trip up to Maryland for New Year's. Not only did I go up to Maryland, but while there, I participated in a 1920s-themed murder mystery. 'Twas delightful! I played a character known as "The Baroness." That is a real mink that belonged to my great-grandmother. Baller!


There was a minor snag in our festivities when we discovered that we didn't bring a proper corkscrew, but we made do.


On New Year's Day, we all partook in a Saratoga Springs New Year's tradition called the Peppermint Pig (TM). You have this little pig made of peppermint and you go around the circle and each person says something that he or she was grateful for in the past year. Then you hit it with a hammer! You can read about this tradition in detail by clicking on the picture below. It was both touching and slightly dangerous, so it was perfect for New Year's.


My sojourn up north also included a brief visit to DC, during which I got to visit the wonderful cupcake store Baked and Wired in Georgetown. Because it was early in the day, I decided to go for the "breakfast cupcake" as I called it: a pancake batter cupcake with maple frosting and, get this, candied bacon! It was really tasty, but way too rich.


That's about all I have to report for now, dear readers, but before I go I want to tell you about my two other side projects, both of which have tabs up at the top of this blog. The first is my creative writing blog, aptly titled Pretentious Writing Blog. Feel free to leave comments on my poetry. I hope you like it, but you're not required to. The other new blog I started is brand new for this year. It's called A Year in Lunch. It is my 366-day photo challenge, for which I will be photographing my lunch every day of 2012. Both of these blogs are longing for followers, so check them out and if you like them (or me), follow them. Thanks! Happy New Year!

Wednesday, December 28, 2011

Merry After-Christmas!

Well, folks, I've been on a bit of a holiday hiatus, but I'm back now, and I have another delicious recipe to share. This Boxing Day, my mother invited my father's extended family over for a Leftovers Party. It was a brilliant idea because we got to eat all new things without actually having to make new dishes AND now I don't have to eat the same leftovers for the next week. Because they're gone. Seriously. Boxing Day Leftovers Party. Try it.

My father's family are very talented in the kitchen, so there were lots of wonderful of things to eat that day, but for me, it was all overshadowed by the dessert my cousin Shawna brought: Cookie Dough Dip with apples. This stuff is incredibly good. There's no actual cookie dough in it, so there's no concern about contracting salmonella, but it's so tasty you wouldn't know the difference. She was kind enough to leave us her recipe, and now I share it with you, dear reader. That's my Christmas gift to you.

Cookie Dough Dip


Ingredients:
  • 1 8oz package of cream cheese, softened
  • 1/2 cup butter, softened
  • 1 cup powdered sugar
  • 2 tbsp brown sugar
  • 1 1/2 tsp vanilla
  • 1 cup chocolate chips
  • 1 cup toffee bits

Instructions:
  1. Cream together cream cheese and butter.
  2. Add all remaining ingredients and mix until well combined.
  3. Serve with chocolate graham crackers or apple wedges.

It's that simple! Shawna recommends eating it with graham crackers or apple wedges. I recommend eating it with a spoon!


Monday, December 19, 2011

Christmas in Florida. Jealous?

Sorry it's been a while since I last updated. I'm back in Florida, folks, and it is glorious. You can tell it's almost Christmas because of the penguin wearing a Santa hat!


And I don't want to hear anyone complain that "it doesn't feel like Christmas" when it's 80° outside (~26° C). You want it to feel like Christmas? Drink some eggnog. I will take warmth tempered by a cool breeze over battling wind storms in Edinburgh any day.

Speaking of eggnog, I made some this weekend. It was a smash hit at the party I attended. Below you will find my recipe so you can try it for yourself. That way, you can enjoy a delicious Christmas beverage no matter how many miles per hour the wind is blowing.


Kimber's Eggnog Recipe

Ingredients:
  • 12 egg yolks
  • 4 cups of milk
  • 4 cups of light whipping cream
  • 1 1/2 cups of sugar
  • 2 1/2 tsp vanilla extract (separated)
  • 1/4 tsp ground cloves
  • 1/2 tsp cinnamon
  • 1/2 tsp nutmeg
  • Alcohol (optional)

Instructions:
  1. In a saucepan, mix milk, 1/2 tsp of vanilla, cloves, and cinnamon and using the lowest heat setting, slowly bring to a boil, stirring occasionally to keep the milk from burning or developing a film.
  2. In a large bowl, mix egg yolks and sugar and beat until fluffy.
  3. Slowly, SLOWLY, whisk hot milk mixture into egg mixture. This part is key, because if you add the hot milk too fast, the eggs will cook and you will end up with eggnog that has the texture of scrambled eggs. The way that works best for me is to take a ladle-full of milk, dribble it into the eggs while whisking, and repeat until they are completely combined. It takes a bit of patience, but it makes all the difference.
  4. Pour milk and egg mixture back into the saucepan and cook for 3 minutes on medium heat, whisking constantly.
  5. Ok, here the recipe from which I have adapted mine says to let the mixture cool for an hour. I didn't do that, and my eggnog turned out fine. I imagine if you did let it cool, it would thicken a bit more. You can try it if you want, but if you're pressed for time, this step can be skipped.
  6. Add cream, 2 tsp of vanilla, and nutmeg.
  7. Refrigerate overnight.
  8. Add alcohol if you want. I use spiced rum.
  9. Serve.
  10. Enjoy.


Sunday, October 2, 2011

Scottish McDonald's: An Investigative Report

In my world travels, I have often been intrigued by the regional differences one can find in that most hallowed of fast-food chains, McDonald's. As we all know, one of the primary the reasons you go to McDonald's is for the consistency. No matter where in the country you are, you can always count on McDonald's being the same. Go to a different country, though, and all bets are off.

If you're in South Korea, you can expect to eat Bulgogi burgers. If you're in Cyprus, you can apparently purchase Carlsberg beer. So what about Scotland? Well, dear readers, it is my duty as your resident bloggist to find the answers to these kinds of pressing questions. Last week, I walked a little less than 2 miles to my local McDonald's to try out the Scottish version of American fast-food.

Of course, they had some of the usual fare: Big Macs, french fries, Chicken McNuggets, Quarter Pounders, and Filet o' Fish sandwiches. There were a few things, however, that were different. Nothing as extreme as Shrimp Burgers or Vegatable McCurry, but still not the same as what you've had if you've only ever eaten at McDonald's in the States.

I only ordered the four items I found most different/interesting/potentially appetizing. They are detailed below, with pictures. In addition to these four, they had Snack Wraps in Garlic and Herb flavor, something called a Chicken Legend, which I think was just a fried chicken sandwich, and a variety of "Deli Choices" in flavors like spicy vegetable and sweet chili chicken.

But now on the stuff I actually tasted. Here is my meal:


Scottish Product #1: 1955 Burger

I'm really not sure why they named it that. Presumably, everyone in Scotland in the 1950s preferred their burgers this way, but I cannot confirm that, as I am not a Scottish Marty McFly (he would be named Marty MacFly). This twist on your traditional cheeseburger comes with lettuce, tomato, grilled onions, bacon, and some kind of smoky sauce. They were really into smoky things at that McDonald's, which you will see more of later on. The burger doesn't look terribly appetizing all open like that, but I wanted to give an accurate picture of what was inside, minus the tomato, which I removed. It was ok, but of the things I ate that day, it was my least favorite. The smoky sauce just wasn't doing it for me.


Scottish Product #2: Potato Wedges

While I love your traditional McDonald's fries, I have to say that I am a huge fan of the potato wedges. They are more potato-y than their thinner cousins, which I think makes them less greasy and therefore, healthier. (I'm pretty sure they're not healthier, don't eat lots of them just because I said it's ok.) They are also slightly seasoned, which is a nice touch.


Scottish Product #3: Crunchie McFlurry

The McFlurry is, of course, a staple of McDonald's cuisine. What makes the McFlurrys from the Scottish McDonald's unique is that they're made with British candy rather than American, obviously. This one is made with one of my personal favorites, the Crunchie bar. If you've never had a Crunchie, you are missing out. If you don't live in the UK, maybe you can order them on Amazon. If you do live in the UK and have never had one, shame on you. Go buy a Crunchie.


Scottish Product #4: Shake 'n' Taste Chicken

This is my favorite product of the day and the one that I felt required the most explanation/pictures. It is more of a "snack" product, rather than a main course. What it is, is a paper bag with two chicken strips and a packet of flavoring. 


Note again the preference for "smoky." Yum. As the flavor packet says, you rip it open, tip it into the chicken bag, shake, and enjoy.


You end up with chicken strips coated in a vaguely sticky BBQ-flavored powder. The snack was a bit problematic because the powder didn't really distribute evenly over the chicken, and a good deal of it remained on the inside of the bag. However, it was really tasty and made me wish all fast-food chains gave me BBQ powder with my chicken strips.


Well, I hope you've enjoyed this sojourn into the pinnacle of Scottish cuisine, my friends. Until next time, I will be working off the 3000 calories I consumed for your sake in the name of truth.

The End... or is it?


Yeah, it's the end.